lunes, 11 de abril de 2011

[Java] Connect PC and Mobile Phone over Bluetooth using CA-Mobile API


This example shows how use CA-Mobile API to connect PC and Mobile Phones over Bluetooth connections. In this case, I show you how to implement a Server Bluetooth in a PC and we will use a mobile app for chat between peer (PC or Phone).

Using the CA-Mobile Framework you can implements collaborative applications in a simple way, because the API simplifies the hard work to control bluetooth communications.

The CA-Mobile API use bluecove bluetooth library for SE version, and you need add both libraries in your proyects: CA-Mobile Framework API and bluecove 2.1.X.

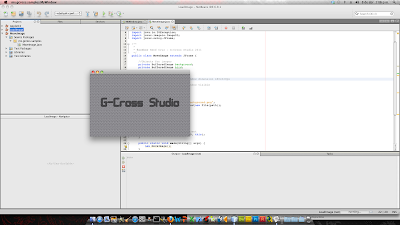
See the library package in the image:

Well, the first code is an Server Control class (MyBTServer.java). The code Here:

package mx.camobile.bluetooth;

import emo.comm.connector.bluetooth.server.BTMultiServer;
import emo.comm.message.common.IMsgProcessor;
import emo.comm.message.common.Message;
import emo.comm.message.common.chat.ChatRoster;

/**
*
* @author René Cruz - G-Cross Studio 2011
*/
public class MyBTServer {
//Bluetooth Server Object

private final BTMultiServer btServer;

public MyBTServer(String nickName, IMsgProcessor processor) {
/* Create an instance of Bluetooth MultiServer
Parameters:
1) The UUID (0x11111) for the published bluetooth service (it will be the same in the mobile app)
2) One MsgProcessor (in this case, the same class process all incomming messages)
3) One Roster instance, the Mobile API includes a simple ChatRoster class.
4) The mode of messages propagation, in this case the sender of messages
* is excludes of propagation to avoid repeated messages.
5) Optional, the name of this server. If not specifies a nickname, the bluetooth
* device ID will be used like nickName.
*/
btServer = new BTMultiServer(0x11111, processor, new ChatRoster(),
BTMultiServer.EXCLUDE_SENDER_BROADCAST, nickName);
}

public void startServer() {
//Start Bluetooth Server
btServer.startServer();
}

public void sendMessage(Message msg) {
//Send one message to all connected peers.
btServer.sendMessage(msg);
}
}

The follow code is for create a GUI for the Chat Server, however I only comment the lines related with the Bluetooth Server. Here is the code for GUI of Bluetooth Server and Chat:
package mx.camobile.gui;

import emo.comm.message.common.IMsgProcessor;
import emo.comm.message.common.Message;
import java.awt.BorderLayout;
import java.awt.event.ActionEvent;
import java.awt.event.ActionListener;
import javax.swing.JButton;
import javax.swing.JFrame;
import javax.swing.JLabel;
import javax.swing.JPanel;
import javax.swing.JScrollPane;
import javax.swing.JTextField;
import javax.swing.JTextPane;
import mx.camobile.bluetooth.MyBTServer;

/**
*
* @author René Cruz - G-Cross Studio 2011
*/
public class SimpleGUI extends JFrame implements ActionListener, IMsgProcessor {

private JTextField txtNickName;
private JTextField txtMessage;
private JButton btnConnect;
private JButton btnSend;
private JTextPane txtHistory;
private JScrollPane panel;
private JPanel panelNorth;
private JPanel panelSouth;
private MyBTServer btServer;

public SimpleGUI() {
setSize(400, 200);
setLayout(new BorderLayout());
setDefaultCloseOperation(JFrame.EXIT_ON_CLOSE);

panelNorth = new JPanel();
panelNorth.add(new JLabel("Nickname:"));
txtNickName = new JTextField(20);
panelNorth.add(txtNickName);
btnConnect = new JButton("Connect");
btnConnect.addActionListener(this);
panelNorth.add(btnConnect);
add(panelNorth, BorderLayout.NORTH);

txtHistory = new JTextPane();
panel = new JScrollPane();
panel.setViewportView(txtHistory);
add(panel, BorderLayout.CENTER);

panelSouth = new JPanel();
panelSouth.add(new JLabel("Message:"));
txtMessage = new JTextField(20);
panelSouth.add(txtMessage);
btnSend = new JButton("Send");
btnSend.addActionListener(this);
panelSouth.add(btnSend);
add(panelSouth, BorderLayout.SOUTH);
setVisible(true);
}

public static void main(String[] args) {
SimpleGUI simpleGUI = new SimpleGUI();
}

public void actionPerformed(ActionEvent e) {
if (e.getSource() == btnConnect) {
//Create a instance of BTServer controller
btServer = new MyBTServer(txtNickName.getText(), this);
//Start BTServer
btServer.startServer();
btnConnect.setEnabled(false);
txtHistory.setText("Server started\n");
} else if (e.getSource() == btnSend) {
/*
* Create an instance of Message class, to send it over BluetoothServer
* Parameters:
* 1) Type of message (LOGIN_MESSAGE, LOGOUT_MESSAGE, NORMAL_MESSAGE, ROSTER_MESSATE, SYSTEM_MESSAGE)
* 2) NickName of sender
* 3) Body or content of Message
*/
Message message = new Message(Message.NORMAL_MESSAGE, txtNickName.getText(), txtMessage.getText());
//Send message over bluetooth server
btServer.sendMessage(message);
txtMessage.setText("");
}
}

public void processMsg(String string) {
// not used in this example...
}

public void processMsg(Message msg) {
// Extract the Type of Message
switch (msg.getType()) {
case Message.LOGIN_MESSAGE: {
txtHistory.setText(txtHistory.getText() + msg.getSender() + " is connected\n");
}
break;
case Message.LOGOUT_MESSAGE: {
txtHistory.setText(txtHistory.getText() + msg.getSender() + " was disconnected\n");
}
break;
case Message.NORMAL_MESSAGE: {
txtHistory.setText(txtHistory.getText() + msg.getSender() + ": " + msg.getMsgBody() + "\n");
}
break;
}
}

public void processMsg(int i) {
// not used in this example...
}
}

For test this Bluetooth Server, I used a mobile appication that was developed using CA-Mobile API ME version, however I will show you the code in the next examples. The mobile chat application was tested using a Sony Ericsson K790 mobile phone, and works great!

The libraries used in this example:

Download CA-Mobile API ME version beta 1.3
Download CA-Mobile API SE version beta 1.0
Download Bluecove Bluetooth Library 2.1 (x86)
Download Bluecove Bluetooth Library 2.1.1 (x64)

Test the code and comment, thanks!.

Download the Netbeans project and mobile application J2ME for testing(.jar/.jad) Here!

sábado, 9 de abril de 2011

[J2ME] CA-Mobile Framework


Well, in this occasion want to show you the CA-Mobile Framework, a tool for design & develop educational collaborative activities based on mobile devices with J2ME support.

CA-Mobile Framework was developed when I was studying my Ph.D., and includes several instruments for the educational field, however this framework includes an API (CA-Mobile API) for develop collaborative software over Bluetooth communications between mobile devices and PC. For this reason, the CA-Mobile API include two versions: mobile version and desktop version.

Using this API you can develop applications in mobile devices in an easy way, including a simple and homogeneous GUI based on single menus and canvas to show different content (text, graphics, animations, etc).

The CA-Mobile API allows you to communicate mobile devices and PC on the same way to exchange string messages and files like images from camera, text, video or http://www.blogger.com/img/blank.gifanother format.

This is a work in progress but the beta version of two API are available for use it in open and non-comercial projects.

This is the official site of CA-Mobile Framework and you can download beta version of API there.

If you need some help or you are interested in this project, you can contact me by email.

I hope that CA-Mobile API will be to helpfull in your future projects, Enjoy it!

Demo of app developed with CA-Mobile API:

viernes, 8 de abril de 2011

[Java] Draw & moving images inside an Applet using Doble Buffer Technique


Hi, this is the example of how implements the double buffer technique in an Applet, because the procedure it's very different compared with JFrame method.

In this case, I used an instance of Image class to draw in memory all scene, after we will paint it in a single step, this avoid the flicker in the screen when the image is moving.

NOTE: Remind to create a HTML document to use this Applet.

The code of Applet is here:

package mx.gcross.samples;

import java.applet.Applet;
import java.awt.Graphics;
import java.awt.Image;
import java.awt.event.KeyEvent;
import java.awt.event.KeyListener;

/**
*
* @author René Cruz - G-Cross Studio 2011
*/
public class DobleBufferApplet extends Applet implements KeyListener {
//Empty image for doblebuffer
private Image dobleBuffer;
private Graphics myGraphics;

private Image background;
private Image bird;
int cordX = 20;
int cordY = 30;

public void init() {
background = getImage(getDocumentBase(), "background.jpg");
bird = getImage(getDocumentBase(), "bird.png");

addKeyListener(this);

// Init doble buffer
dobleBuffer = createImage(getWidth(), getHeight());
myGraphics = dobleBuffer.getGraphics();

//Draw images, only the first time
drawImages();
}

@Override
public void update(Graphics g) {
//Draw images in the new positions
drawImages();
//Draw the buffer in the screen
g.drawImage(dobleBuffer, 0, 0, this);
}

public void drawImages() {
myGraphics.drawImage(background, 0, 0, getWidth(), getHeight(), this);
myGraphics.drawImage(bird, cordX, cordY, this);
}

//While a key is pressed
public void keyPressed(KeyEvent ke) {
switch (ke.getKeyCode()) {
//if the right arrow in keyboard is pressed...
case KeyEvent.VK_RIGHT: {
cordX +=3;
}
break;

//if the left arrow in keyboard is pressed...
case KeyEvent.VK_LEFT: {
cordX -=3;
}
break;

//if the down arrow in keyboard is pressed...
case KeyEvent.VK_DOWN: {
cordY +=3;
}
break;

//if the up arrow in keyboard is pressed...
case KeyEvent.VK_UP: {
cordY -=3;
}
break;

}
//call explicit to paint
repaint();


}

//When a key is typed (once)
public void keyTyped(KeyEvent ke) {
}

//When a key is released (typed or pressed)
public void keyReleased(KeyEvent ke) {
}
}

Test the code and comment, thanks!.

If you prefer the complete code source, resources and the HTML document in a Netbeans project, Download It Here!

[Java] Move images inside JFrame using Doble Buffer Technique


Here is an example of how to draw and move images inside JFrame using the Doble Buffer technique and BufferStrategy model.

This technique is used to avoid the flicker in the screen when an image is moving. In case of Applets the doble buffer technique is different, see the next example.

The code here:
package mx.gcross.samples;

import java.awt.Graphics;
import java.awt.Graphics2D;
import java.awt.event.KeyEvent;
import java.awt.event.KeyListener;
import java.awt.image.BufferStrategy;
import java.awt.image.BufferedImage;
import java.io.File;
import java.io.IOException;
import javax.imageio.ImageIO;
import javax.swing.JFrame;

/**
*
* @author René Cruz - G-Cross Studio 2011
*/
public class DobleBufferJFrame extends JFrame implements KeyListener {

//Objects for images
private BufferedImage background;
private BufferedImage bird;
//First coordinates of bird image
private int cordX = 50;
private int cordY = 250;
//Objects for doble buffer
private BufferStrategy myBuffer;

public DobleBufferJFrame() {
setTitle("Doble Buffer Image Sample");
//set window dimension 480x320px
setSize(512, 512);
//load images...
loadImages();
//make window visible
setVisible(true);
//Ignore OS paint calls
setIgnoreRepaint(true);

//create a doble buffer objects
//NOTE: It's very important to create bufferStrategy after
//JFrame is visible, in other case fail!
this.createBufferStrategy(2);
myBuffer = this.getBufferStrategy();
//call explicit to paint first time
repaint();
}

public void loadImages() {
try {
//path for image file
String pathBackground = "images/background.jpg";
background = ImageIO.read(new File(pathBackground));
String pathBird = "images/bird.png";
bird = ImageIO.read(new File(pathBird));

} catch (IOException ex) {
ex.printStackTrace();
}
//asociate the keyboard listener with this JFrame
addKeyListener(this);
}

public void drawImages(Graphics2D g) {
//draw brackground image (first image)
g.drawImage(background, 0, 0, this);
//draw bird image (second image, in this order)
g.drawImage(bird, cordX, cordY, this);
}

public void paint(Graphics g) {
Graphics2D g2 = null;
if (myBuffer != null) {
try {
//get the graphics2d object of the buffer
g2 = (Graphics2D) myBuffer.getDrawGraphics();
//draw images in buffer
drawImages(g2);
} finally {
g2.dispose();
}
//draw the content of buffer in the screen
myBuffer.show();
}
}

public static void main(String[] args) {
new DobleBufferJFrame();
}

//While a key is pressed
public void keyPressed(KeyEvent ke) {
switch (ke.getKeyCode()) {
//if the right arrow in keyboard is pressed...
case KeyEvent.VK_RIGHT: {
cordX ++;
}
break;

//if the left arrow in keyboard is pressed...
case KeyEvent.VK_LEFT: {
cordX --;
}
break;

//if the down arrow in keyboard is pressed...
case KeyEvent.VK_DOWN: {
cordY ++;
}
break;

//if the up arrow in keyboard is pressed...
case KeyEvent.VK_UP: {
cordY --;
}
break;

}
//call explicit to paint
repaint();


}

//When a key is typed (once)
public void keyTyped(KeyEvent ke) {
}

//When a key is released (typed or pressed)
public void keyReleased(KeyEvent ke) {
}
}

Test the code and comment, thanks!.

If you prefer the complete code source and resources in a Netbeans project, Download It Here!

[Java] Move an image inside JFrame or Applet using keyboard!


This example show how to load and move one image using keyboard arrows inside a JFrame or an Applet, it's the same procedure.

It's not a good way to draw and move the images with this method, because you will see flashing the window while the image is moving, but it's the most simple way to show you how know which key was pressed and how move the image. In the next example, I will show you how to draw images using a doble buffer technique in order to avoid the flashing in the screen!.

Well, the code for this example is here:
package mx.gcross.samples;

import java.awt.Graphics;
import java.awt.event.KeyEvent;
import java.awt.event.KeyListener;
import java.awt.image.BufferedImage;
import java.io.File;
import java.io.IOException;
import javax.imageio.ImageIO;
import javax.swing.JFrame;

/**
*
* @author René Cruz - G-Cross Studio 2011
*/
public class MoveImage extends JFrame implements KeyListener {
//Objects for images

private BufferedImage background;
private BufferedImage bird;
//First coordinates of bird image
private int cordX = 50;
private int cordY = 250;

public MoveImage() {
setTitle("Move Image Sample");
setSize(512, 512); //set window dimension 480x320px
loadImages();
setVisible(true); //make window visible
}

public void loadImages() {
try {
//path for image file
String pathBackground = "images/background.jpg";
background = ImageIO.read(new File(pathBackground));
String pathBird = "images/bird.png";
bird = ImageIO.read(new File(pathBird));

} catch (IOException ex) {
ex.printStackTrace();
}
//asociate the keyboard listener with this JFrame
addKeyListener(this);
}

@Override
public void paint(Graphics g) {
super.paint(g);
//draw brackground image (first image)
g.drawImage(background, 0, 0, this);
//draw bird image (second image, in this order)
g.drawImage(bird, cordX, cordY, this);
}

public static void main(String[] args) {
new MoveImage();
}


//While a key is pressed
public void keyPressed(KeyEvent ke) {
switch (ke.getKeyCode()) {
//if the right arrow in keyboard is pressed...
case KeyEvent.VK_RIGHT: {
cordX+=3;
}
break;
//if the left arrow in keyboard is pressed...
case KeyEvent.VK_LEFT: {
cordX-=3;
}
break;
//if the down arrow in keyboard is pressed...
case KeyEvent.VK_DOWN: {
cordY+=3;
}
break;
//if the up arrow in keyboard is pressed...
case KeyEvent.VK_UP: {
cordY-=3;
}
break;
}
repaint();
}

//When a key is typed (once)
public void keyTyped(KeyEvent ke) {}

//When a key is released (typed or pressed)
public void keyReleased(KeyEvent ke) {}
}

Test the code and comment, thanks!.

If you prefer the complete code source and resources in a Netbeans project, Download It Here!

[Java] First Steps: Load a PNG/JPG image in a JFrame


Hi, this is one simple code for load and show an image inside a JFrame, using a BufferedImage to load image data from a specific local path (could be a URL if you prefer).


Steps:
1.- Create a BufferedImage object.
2.- Read the image file for a specific path
3.- Draw the image in the screen using "paint()" method.

That's it!
package mx.gcross.samples;

import java.awt.Graphics;
import java.awt.image.BufferedImage;
import java.io.File;
import java.io.IOException;
import javax.imageio.ImageIO;
import javax.swing.JFrame;

/**
*
* @author Rene Cruz - G-Cross Studio 2011
*/
public class MyWindow extends JFrame {

//Object for image
private BufferedImage background;

public MyWindow() {

setSize(480, 320); //set window dimension 480x320px
loadImages();
setVisible(true); //make window visible
}

public void loadImages() {
try {
//path for image file
String path = "images/background.png";
background = ImageIO.read(new File(path));
} catch (IOException ex) {
ex.printStackTrace();
}
}

@Override
public void paint(Graphics g) {
super.paint(g);
//draw the bufferedImage object
g.drawImage(background, 0, 0, this);
}

public static void main(String[] args) {
new MyWindow();
}
}

Test the code and comment, thanks!.

If you prefer the complete code source and resources in a Netbeans project, Download It Here!

martes, 5 de abril de 2011

First code!

Sample code for test SyntaxHighlighter:
public class Hello {
public static void main(String args[]) {
System.out.println("Hello Blog World!");
}
}

That's it!

Welcome to my blog!

Hi, I hope that you can find interesting issues related with mobile programming and platforms, and design and development of videogames too!

All the examples try to explain several topics from basics to advanced technics.

The examples are related with:
  • J2ME, J2SE y Bluetooth
  • Android
  • iPhone, iPad y iPod
  • Blackberry
  • Palm WebOS
  • Windows 7 Mobile
  • XBox 360
Also, we will explain another examples of specific issues related with videogames development in the follow lenguages:
  • C/C++
  • Java
  • C#
  • Objective-C
  • PHP
All examples placed here are not tutorials or courses, however includes the complete code source of each example.

So, Enjoy and comment!